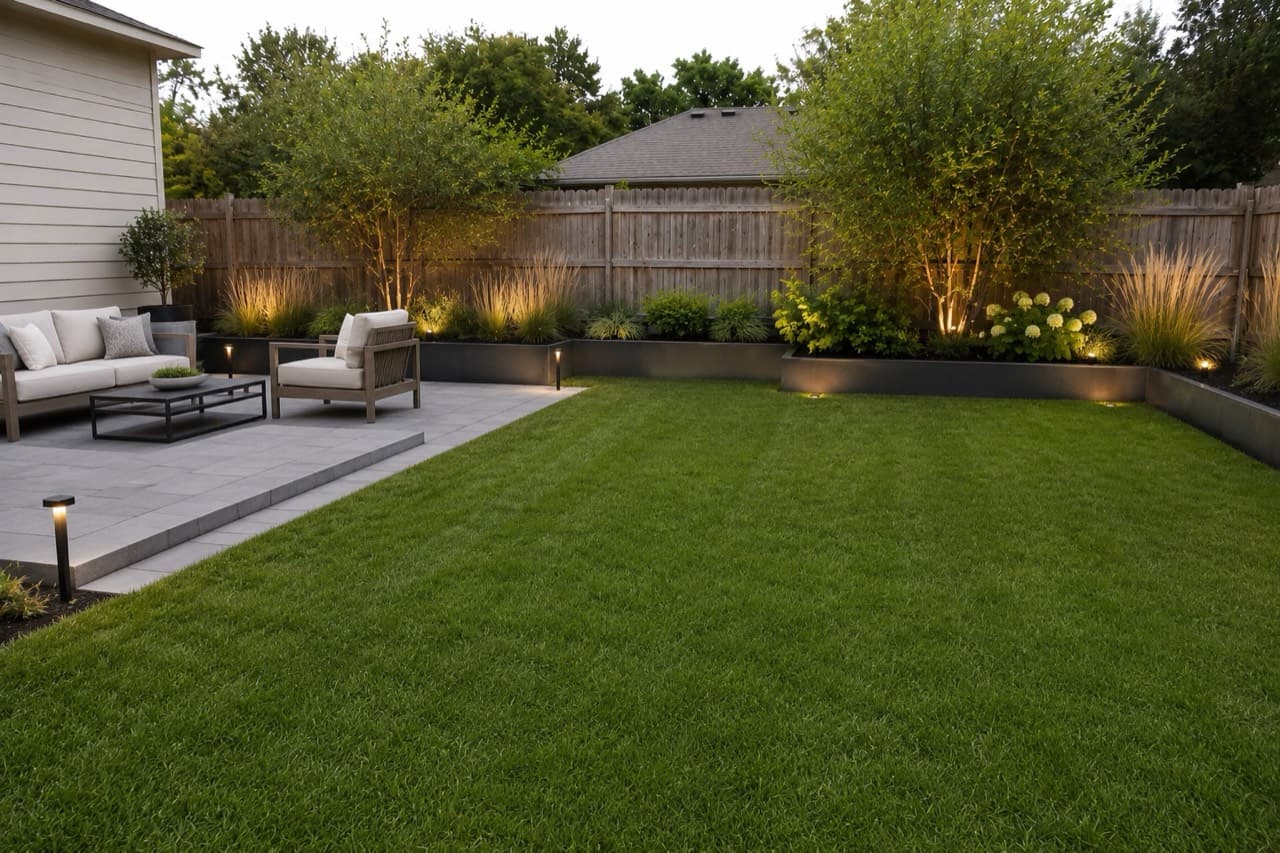
Most DIY yards go wrong at the nursery. Someone buys a flat of plants on a sunny Saturday in May, finds a spot for each one, and three years later the shrubs are swallowing the front windows and the lawn still floods by the back door. Nothing was wrong with the plants. There was no plan.
Knowing how to design a landscape is mostly about doing things in the right order: learn the site, decide what the yard is for, draw it, build the hard parts, and only then plant. Landscape designers follow that sequence, and a homeowner with a tape measure, graph paper and a free weekend can follow it too.
Quick answer: to design your own landscape, study your yard's sun, drainage and slope; call 811 to mark buried utilities; list what you want each area to do; draw a base map to scale and sketch layouts over it; preview the look; build paths, patios and bed edges first; then plant in layers, spaced for mature size, and phase the work by season.
How to design a landscape: the 8 steps at a glance
- Study the yard: sun hours, drainage, slope, soil, wind and views.
- Find what is underground: call 811 a few business days before any digging.
- Decide what the yard is for and divide it into zones.
- Draw a base map to scale, then sketch designs on tracing paper over it.
- Preview the look on a photo of your own yard before you buy anything.
- Build the hardscape first: paths, patio, edging, walls.
- Plant in layers, in odd-numbered groups, spaced for mature size.
- Budget and phase the work across seasons.
The rest of this guide takes each step in turn, then answers the questions people ask most: the 3-5-7 rule, the 7 principles of landscape design, and how to landscape the front of a house.
Step 1: Study your yard before you design anything
Site analysis is the first step in landscape design, and it's easy to overlook. Spend a few weeks noticing how the yard actually behaves, and write it down on a rough sketch.
- Sun: check each bed area in the morning, at noon and late afternoon. Plant tags use full sun for 6 or more hours of direct sun, part sun or part shade for about 3 to 6, and shade for less than 3.
- Drainage: watch where water sits after a heavy rain. To test a planting spot, dig a hole about 12 inches deep, fill it with water, let it drain, refill it and time it. Water dropping less than about an inch per hour means poorly drained soil, so choose plants that tolerate wet feet or fix the drainage first.
- Slope: the ground next to the house should fall away from it. Building codes commonly ask for about 6 inches of drop over the first 10 feet, and new beds or mulch piled against the foundation can quietly undo that.
- Soil: a basic soil test from your county extension office costs little and tells you pH and nutrients before you spend on plants.
- Climate: look up your zone on the USDA Plant Hardiness Zone Map. It tells you which perennials, shrubs and trees survive your winters.
- Views and wind: mark what you want to see from the kitchen window, what you want to hide (the neighbor's shed, the AC unit), and where the wind comes from.
If you just moved in, the old advice still holds: live with the yard through a full season before you rip anything out. Bulbs and perennials you didn't know about will show up, and you'll learn where the afternoon sun really lands.
Step 2: Call 811 before you dig
Call 811, or file a request on your state's 811 website, a few business days before any digging, including planting a single shrub or setting fence posts. The service is free, and utility companies send someone to mark buried gas, electric, water and cable lines with paint or flags. Required notice varies by state, typically two to three working days, so check the rules at call811.com. Some lines are buried only inches deep, and knowing where they run also tells you where not to put a tree.
Step 3: Decide what the yard is for
Write a needs list before you write a plant list. Who uses the yard, and for what? Dining, a play lawn for kids, a dog run, vegetables, a quiet place to sit, privacy from the street, room for the trash cans and a hose. Be honest about maintenance too: a yard you'll mow and weed once a week looks very different from one you'll touch once a month.
Then group those needs into zones. Designers usually think in three: the public area (the front yard, seen from the street), the private living area (usually the backyard) and the service area (trash, compost, AC unit, side yard storage). Put each activity where the site supports it. The vegetable bed goes where the sun is, and the seating goes where the view is.
Step 4: How to draw a landscape plan
To draw a landscape plan, measure your property and house, draw them to scale on graph paper as a base map, mark everything that stays (trees, utilities, downspouts, doors, windows, slopes), and then sketch design ideas on tracing paper laid over the base map. For most yards, a scale of 1/8 inch = 1 foot fits on a large sheet; use 1/4 inch = 1 foot for a small lot or a single bed.
A practical order that works:
- Measure the property lines, then the house walls, then the distance from the house to each boundary. Your property survey or the county's parcel map gives you a head start.
- Draw the base map in pen: house footprint, driveway, walks, existing trees, fences, the 811 marks, downspouts, hose bibs, AC unit, plus a north arrow.
- Lay tracing paper over it and draw bubble diagrams first: loose circles for each zone from Step 3. Do several versions; they're free.
- Turn the best bubbles into shapes: the actual patio outline, path widths, bed edges.
- Draw plants as circles at their mature spread, at the same scale. A shrub that grows 4 feet wide is a half-inch circle at 1/8 inch = 1 foot. This one habit prevents most overcrowding.
If paper isn't your thing, free online drawing tools and landscape apps do the same job. The format matters less than the scale: a plan that isn't measured can't tell you whether the patio fits a table and six chairs.
Step 5: Preview the look before you dig
A plan view tells you where things go but not what the yard will feel like from the back door or the street. That gap is where expensive second thoughts come from: the gravel that looks harsh against your siding, the bed that turns out too narrow once you see it next to the house.
This is the step where an AI tool earns its place. Roomvana's AI landscape design tool takes one photo of your actual yard and redesigns it in a style you pick, with new planting, paths, a patio and lighting, while keeping your house in place. Try three or four styles and you'll learn quickly whether you want clean modern lines or a looser cottage feel. It's free to try after Google sign-in, and free results carry a watermark; you can also try the free landscape design tool.
Use it to settle the style and the big shapes, then carry those decisions into your measured plan and pick plants that suit your climate.
Step 6: Build the hardscape before you plant
Install hardscape first: grading and drainage fixes, then walls, patios and paths, then bed edging, then plants, then mulch. Hardscape work involves heavy equipment, compacted base and wheelbarrow traffic, and any plant in the way gets trampled. Paths and patios are also the bones that make a yard look designed even before anything grows in.
A few sizes worth knowing: a front walk should be at least 4 feet wide, and 5 feet lets two people walk side by side. A dining patio needs roughly 12 by 12 feet for a table and chairs with room to push back. Retaining walls taller than about 4 feet usually need engineering and a permit in many US jurisdictions, so check with your local building department before you plan one.
Step 7: Plant in layers, spaced for mature size
Plant in layers from tallest at the back to lowest at the front: trees, then large shrubs, then small shrubs and perennials, then groundcover at the edge. In a bed seen from both sides, put the tall layer in the middle. Start with evergreens and structural shrubs so the yard has a shape in January, then fill in with perennials and seasonal color.
Space plants by their mature width, not their size in the pot. If the tag says a shrub reaches 4 feet wide, plant them about 4 feet apart, center to center. The bed will look sparse for two seasons; fill the gaps with mulch or annuals instead of extra shrubs you'll be pulling out in year four. Next to the house, plant shrubs at least half their mature width plus a foot or two from the foundation, so they don't rub the siding or trap moisture.
Step 8: Budget and phase the work by season
Few homeowners build a whole landscape at once, and you don't have to. Split the plan into phases in the same order you'd build it, price each phase separately, and finish one before starting the next. A sensible calendar for most of the US:
- Winter: finish the plan, get contractor quotes for anything you won't do yourself, and order materials. Contractors are easier to book now than in April.
- Early spring, once the ground is workable: drainage fixes, hardscape, bed edging and soil prep.
- Spring: plant perennials and anything tender after your last frost date.
- Fall: plant trees and shrubs. Cooler air and still-warm soil help roots establish before the next summer's heat, which is why many nurseries call fall the best planting season.
Spend on the bones first. A yard with a good path, a patio and a few well-placed shrubs looks finished; a yard full of plants with no structure doesn't. If the budget is tight, our guide to backyard ideas on a budget covers cheap ways to get that structure, like gravel patios and clean bed edges.
What is the 3-5-7 rule in landscaping?
The 3-5-7 rule in landscaping means planting in odd-numbered groups of 3, 5 or 7 of the same plant instead of singles, pairs or other even-numbered groups. Odd groups look more natural because the eye can't split them evenly down the middle, and they read as a deliberate drift instead of scattered specimens. Use groups of 3 in small beds and 5 or 7 in larger ones; past about 9 or 10 plants, a group simply becomes a mass planting.
Definitions vary a little by source. Some extend the series to 9, and some guides also use 3-5-7 loosely when talking about plant heights or layers, though the common meaning is group size. Two practical refinements: stagger each group in a triangle or zigzag rather than a straight line, and break the rule on purpose when symmetry is the point, such as a matching pair of planters flanking a front door.
What are the 7 principles of landscaping?
The 7 principles of landscape design most often listed are unity, balance, proportion, focalization, simplicity, rhythm and sequence. They come from the same design tradition taught in university extension courses, but the exact list varies: Michigan State University Extension, for example, teaches six, and other sources add color, line or contrast. Treat them as a checklist for your sketch, not a test.
- Unity: the yard looks like one design. Repeat a few plants, one paving material and one color family throughout.
- Balance: the two sides feel equal in visual weight. Symmetrical balance is formal and mirrored; asymmetrical balance pairs a large tree on one side with a group of shrubs on the other.
- Proportion (or scale): features fit the house and each other. A tiny patio looks lost behind a large house, and a 30-foot tree overwhelms a one-story cottage.
- Focalization (or emphasis): one place draws the eye first, like the front door, a specimen tree or a fire pit. Too many focal points and none of them works.
- Simplicity: leave out whatever doesn't help. Fewer plant varieties in bigger groups almost always look better than one of everything.
- Rhythm (or repetition): elements repeat at intervals, such as the same shrub every 6 feet along a walk, which leads the eye through the space.
- Sequence (or transition): changes happen gradually, from tall to short, coarse to fine texture, or dark to light, instead of jumping.
How to landscape the front of a house
To landscape the front of a house, start with a clear, generous path to the front door, add foundation planting that stays below the windowsills, give the beds a crisp curved or straight edge against the lawn, and pick one focal point near the entry. Everything in a front yard is judged from the street, so design it from the street, not from the porch.
- Make the entry obvious. A visitor should know which door to use without thinking. Widen a skinny walk, light it, and keep plants from crowding the steps.
- Size foundation beds generously. Beds at least 4 to 6 feet deep give you room for two layers; the classic mistake is a 2-foot strip of shrubs against the wall.
- Choose shrubs by mature height. If a window sits 3 feet off the ground, the shrub under it should top out below that.
- Soften corners. A small tree or tall shrub at the house corners frames the facade and makes the house look settled.
- Leave the lawn as a simple shape. A clean rectangle or a single curve reads calmer than lawn cut into islands.
 Before
 After
Look at what changed in the example above. The walk follows the same line, the tall evergreen by the door stayed, and the house is untouched. The difference comes from bed edges that now curve away from the steps, shrubs arranged in layers rather than in two overgrown clumps, and low lights marking the path. The yard looks finished because the bed lines and the path got cleaned up, not because more plants went in.
When should you hire a pro instead?
Bring in a professional when the job involves serious grading or drainage problems, retaining walls over about 4 feet, work near the foundation, a large tree removal, or a budget big enough that a mistake would really hurt. A landscape designer can turn your sketch and your preferred style into a measured planting plan; a contractor can price your phases. Either way, arriving with a needs list, a rough base map and a picture of the look you want makes the conversation shorter and the quote more accurate.
If you do one thing this week, make it the sun map. Walk the yard three times in one day and note where the light falls. Every other decision in this guide gets easier once you know it.
See your yard redesigned before you dig
Upload one photo of your front yard or backyard and try a few landscape styles. Free to try after Google sign-in.
Design my landscape